


 This gift has special meaning to me because of the difficult things I have gone through in the past year. Both my parents and my only sibling are chronically ill and were hospitalized several times this past year. I started my first year in a new school and was struggling to not let my personal life impact my effectiveness as a teacher. I felt that there was so much more I wanted to do with my students, but I was emotionally drained. Then I started teaching about James Rizzi. The events that occurred (see previous posts) after getting in contact with Henry and corresponding, were amazing. I was receiving the affirmation that I needed at such a difficult time. I am the only art teacher in my building and one of two in my district. Sometimes I question my skills as a teacher because I am all alone ( I am sure some of you can relate). It may sound silly, but I needed to be valued. So…thank you for valuing what I do as a teacher!


I have to admit I do enjoy adding some festive lessons plans into my curriculm. The students enjoy them, and they tend to fit well in the art schedule right before break. Here are a few cute gingerbread houses my 1st graders created.

We started by drawing a house together. I then showed pictures of gingerbread houses and we discussed what to add to their houses. The students used color sticks and construction paper crayons to colors their houses (I showed a demo on how well theses materials work on back paper in comparison with regular crayons. The kids are always amazed). On the next day they added “frosting” of white paint, to finish their pictures.

This little girl was absent on the first day we drew our houses, but I love what she came up with on her own. Very creative!


 This year is 3rd grade we are studying the art of different cultures. Each student has a Passport (which I will share soon), and they fill it out every time we study a new culture. We recently learned about fabric Molas, and the Kuna people who create them. The Kuna people live off the coast of Panama on the San Blas Island.

When teaching about Molas, I like to use the video “Paper Molas” with Peggy Flores. This video demonstrates how to create two types of Paper Molas. The first method involves an x-acto knife (I used razor blades wrapped in tape) and is subtractive. The second method uses scissors and is additive. This year my 3rd graders used the scissors method. As seen in the pictures above. Below are examples from my 7th graders who used the subtractive method.


 I was going through some of my old pictures and was reminded on this winter lesson. Students traced their hand to make mittens and decorated with warm colors. Then they used white oil pastels to add snow in the background and colored with cool colors. I believe I found this idea on Artsonia a few years ago.
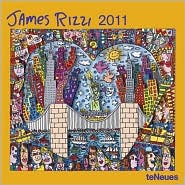
 In my previous posts on James Rizzi, I have shared a few lessons my students created. Luckily, learning about Rizzi did not end there. I was able to contact Rizzi’s Representative Henry Welt and share the work my students had done. One day I received a package in the mail with a book, and this lovely letter by James Rizzi himself.
I was giddy and so were the kids. We eventually made our own letters and sent them to Rizzi. It was a wonderful experience!
I am still in communication with Henry Welt, and he is excited to hear that other art teachers are using Rizzi’s artwork in their art classes. He has told me that he is interested in seeing what teachers are doing with their students. We are hoping to accumulate all different Rizzi lessons. If you have ideas and pictures you would like to share, please link to this blog or contact Henry Welt.
James Rizzi seems to be passionate about the art of children. He is even in the process of creating a future book/toy. Let me know your thoughts? What would you like to use in your classroom? Do you or would teach kids about the work of James Rizzi ?

This is a simple lesson I taught to my 1st graders. I only spent one 50 min. class on this project. In retrospect, I would have taken two days. I think the results would have been better.
Step 1: We looked at pictures of James Rizzi’s silly buildings (as I call them) 
Step 2: Each chose a colored piece of paper and cut it into an interesting building shape. Some students made a pop out door. They glued their building on a 9x12 piece of black paper.
Step 3: We added details using construction paper crayons (I first demonstrate how these crayons work on black paper compared to regular crayons. The kids are always amazed.)
Step 4: Lastly, I gave the students sequence and foam shapes to add to their buildings.


